Crafty Blogs

Thursday 24 December 2009

Display Ideas No. 4

Artwork Hanging System


And finally... For my last post of 2009 I'm sharing a display idea which I found over at the Madhouse. It's basically an improved version of the old 'washing-line' display, but I think looks much neater and smarter, as it uses metal tension wires and clips (the kind you can get for hanging curtains).  It's really simple and effective, and you can change the pictures so easily.

Wednesday 23 December 2009

Display Ideas No.3

RIBBA Picture Ledge - IKEA


I came across this idea, or more accurately 2 ideas, at Ikea.  Again, they're really simple and effective, like all the best ideas, and they don't cost a great deal.  The first is the RIBBA picture ledge.  This is a narrow shelf (available in white or black and in a variety of lengths) which is specifically intended for pictures in frames to sit on, propped against the wall.  A small retaining edge on the shelf ensures that the frames don't slide off.  It's a very flexible way of displaying pictures, which can be changed really easily without having to knock nails or pins in the wall.  You can use just a single shelf as shown here, or several at different heights, and of course it's not just suitable for displaying kids artwork, but can be used for any framed picture. I really like this idea, and intend to use it myself, though I'm a bit concerned about my ability to put it up straight!


I was really pleased when I came across this photo, as it combined in one image the 2 ideas from Ikea that I wanted to share. The second idea uses the simple, cheap, colourful frames that Ikea produce, to create a colourful display of kids artwork.  The NYTTJA frames are available in a variety of sizes and bright colours, with plastic glazing which is much safer for kids rooms.  Used together, either on a picture ledge as shown here, or grouped together on a wall, I think they create a really striking display.


Tuesday 22 December 2009

Display Ideas No.2


Frames Wallpaper


This product has been around for a couple of years, so you may have come across it before, but I think it's a lovely idea for use in a child's bedroom or playroom.  Kids can either colour in the frames directly, or alternatively you can stick paintings and drawings onto the frames.  It's available from Graham and Brown.  At £25 a roll, it's not especially cheap as  wallpaper goes, but then I think it's something you could use in just a small area, as it might be a bit overpowering to do a whole room with it. I've always rather liked the idea of giving kids permission to decorate their own environment by drawing or painting directly on the walls - though it worries me slightly for younger children, who may not recognise the difference between the specific areas where they are allowed to do it, and any other wall they might feel inclined to embellish!


Monday 21 December 2009

Display Ideas No.1

Inflatable Masterpiece Frame

This week, on the run up to Christmas I thought I'd do a completely unseasonal series of mini-posts on display ideas for kids artwork. The first is an item I spotted while out and about last week. The 'Instant Masterpiece' is an inflatable gilt frame for displaying photos, paintings, whatever you want really.  It will display images of up to 10x8".  I haven't tried it out myself, but I thought for just £4.79, it was quite a fun idea for displaying kids artwork.  Anyway if anyone fancies it, it's available here from Amazon.

Wednesday 16 December 2009

Glue, Glitter & Pinecones


I'm sure everyone has made glittery pinecones before at some time or another - after all they're not rocket science, but the idea is so simple, and we had so many pinecones that my elder son had collected, that I thought we'd make some.  We have a very minimal, artificial twiggy tree, so I thought they'd look good hung on that, though I think they would also look good either individually or grouped together in a bowl, as table decorations (a considerably cheaper alternative to Kirsty's gilded pears, if anyone watched her Handmade Christmas!)

I thought it was a simple enough activity for my 3 and 5 year olds to join in - and in theory it is. The 5 year old made quite a few, but unfortunately the just turned 3 year old got bored after doing just one and decided it would be much more fun to be disruptive by throwing the glitter around.  The elder one then decided to try and make glitter glue by pouring the glitter into the glue (I can see his logic, but it was a criminal waste of both, creating just a lumpy useless mess).  Nevertheless, I'm quite pleased with our creations - that is I'm pleased with the glittery pinecones, which are quite effective, but not so pleased with the mess we made.  We used an awful lot of glitter, and it is now EVERYWHERE and probably will be for a long time, in spite of my best efforts to clear up.  I suspected that this is what would happen, but somehow the reality always seems to be worse than my expectations!


Wednesday 9 December 2009

Child Art Prodigies

Everyone loves the naivety and immediacy of children’s art, and will often joke that it is indistinguishable from the work of some well-known artists.  But what if your child seems to have a genuine talent, what if in fact they appear to be a child prodigy?

The term 'child prodigy' is given to a child who is capable of excelling in at least one area of skill, at a level that is considered to be that of a highly trained adult in that field.  Child art prodigies are relatively rare.  There have been some well-documented cases throughout the history of art, including Leonardo da Vinci, and Picasso (who painted ‘The Picador’ at the age of just 8), but many of these did not display ‘adult’ levels of skill until they were a little older, for example John Everett Millais, who entered the Royal Academy Schools at the age of 11, and JMW Turner who was elected as a member of the Royal Academy itself at the age of just 15. (John Constable didn't achieve this until he was 52). This was perhaps inevitable at a time when representational art, in the western world at least, was pretty much universal.  However with the advent of abstract art, and expressionist art in particular, child prodigies have got ever younger, and 2 - 4 years old appears to be the age at which any self-respecting child art prodigy has their first exhibition these days.

One of the most well-known examples is that of Marla Olmstead, who sold her first painting for $253 at the age of 2.  Since then, some of her paintings have been sold for many thousands of dollars.  Some art critics think that she has an impressive ability to paint in layers, and fill the canvas instead of painting in one layer and leaving most of the canvas blank (I’m not too sure that this is especially rare - certainly my 3 year old does this, but then maybe it’s because I give him small pieces of paper instead of large canvases!)  Marla is from an artistic family, but there is a certain amount of controversy about her work, with some critics suggesting that what she does is no more than most children of her age would achieve if they had some additional coaching.

A more recent case which sprang up in Australia earlier this year, is that of Aelita Andre - another 2 year old toddler whose abstract artwork has been selling for between $240-$1400.  Again, there is some debate as to whether it is all her own work (her parents are both artists) though her parents insist that it is.  When her work was first selected for exhibition, her parents apparently neglected to tell the gallery owner that the work was by their 2 year old daughter.  Perhaps that wasn’t important, after all the work did sell. You can see more of Aelita's work at her website.


Along with all the hype, there have been accusations of child exploitation.  I must admit I was tempted to try this the other day when my 3 year old produced a beautiful abstract painting, all swirls of gorgeous colour which any professional artist would have been proud of.   For a brief moment I toyed with the idea of passing it off as my own, and selling it for vast sums of money, but for him it was a work in progress, and although I tried to persuade him to stop there and then, the ‘less is more’ argument cut no ice, and I had to watch in distress as he turned it to mud - it was after all his painting.  However it hasn’t stopped me using some of my elder son’s drawings on some of the nursery artwork I sell (he takes a fee for this!)  They lend a wonderful naïve charm, and he’s happy enough to produce them.  I fear neither of us are going to get rich though.  These were however one of the catalysts behind the development of Artful Kids.  After all, any child’s drawing can be used, and I figured it would be a lovely way for an older sibling to get involved with helping to decorate a younger child’s bedroom.


My own feeling is that the significant thing with these very early ‘prodigies’ is that these are children who are given acrylic paints, large canvases, and the support and encouragement of their artistically trained or educated parents.  This by itself would make such children unusual, add this to a little natural talent, some marketing and PR, and hey presto, you have a ‘prodigy’.  This is not to belittle any skill that they do have, but child prodigies rarely become adult geniuses - what gets the attention of the media, is  the young age of the child more than the quality of the artwork itself, and as with most aspects of normal child development, eventually many of their peers will catch up, or even overtake.

There is a danger that the parents of such children put their own needs first, massaging their egos through reflected glory, rather than considering the effect that all the attention may have on the young child, and what might happen when that attention goes away, as it inevitably will.  Having said all that, Marla Olmstead is still painting and selling her work at the age of 9 - but only time will tell if she will be as famous as an adult artist, as she has been as a child.  You can judge her work for yourself on her website 

You can read  another of my posts about Child Art Prodigies here.

Flickr Photo Credits:

Saturday 5 December 2009

Featured Artist with a Seasonal Theme


My 5yr olds Christmas Picture by HotdogandMe.

My second Featured Artist has been chosen with a seasonal theme.  This contribution was made by HotdogandMe, and is the work of her 5 year old daughter.  It shows Santa in his sleigh in a starry sky, a Christmas tree, snowman, and house with people.  I love this picture, and it reminds me of the work of my own 5 year old.
Thank you to everyone who has uploaded images so far to the Artful Kids Flickr Group - keep them coming!

Tuesday 1 December 2009

Picture Perfect Meme

I have only just discovered what a Meme is - and have certainly never taken part before, but I came upon this one on SnafflesMummy, and as well as appealing to me, I thought it was appropriate for here, so decided to join in. The Meme was started by Tara at Stickyfingers. I picked up on this a little late, but better late than never. The idea was to ask your child to draw or paint a picture of you, and display the results, so here are the portraits of Mummy that my 2 boys produced (the eldest is 5 the younger just turned 3)  I think (hope) you'd struggle to recognise me, but at least they've shown me smiling, and I like to think that's significant!


Tara has done a wonderful video of some of the earlier contributions, but if anyone else has any portraits they'd like to show off by a child under 12, please feel free to add it to the Artful Kids Flickr Group, and I'll feature it here at a future date.  In fact my next post will be devoted to a Featured Artist with a Christmas theme, so if your child has produced a special Christmas picture and you want it to be considered, you'll need to add it soon!

Tuesday 24 November 2009

Personalised Gift Ideas using Kids Artwork

The service I offer over at Artful Kids, is just one way of displaying your children’s artwork.  I am not aware of any other service that offers the same range of  products and services for transforming children’s paintings and drawings into Wall-Art, but  on my travels, I have discovered other imaginative ways to use kids artwork, all of which make excellent gift ideas for Christmas, so I thought I would introduce a few of them here:

Jewellery

You may have seen children’s finger prints transferred to silver, but AM Jewellery specialises in taking children’s drawings and putting them onto beautiful hallmarked silver jewellery.  This can range from cuff-links for Dad, to pendants, brooches, charms and earrings.  I think they make a lovely unusual gift idea.
She also has a blog at http://www.amjewellery.blogspot.com/


Embroidered Cushions

Another service I have come across recently is that offered at extraspecialtouch.co.uk who can take a child’s drawing and turn it into a personalised embroidered cushion or wall panel.
The drawing needs to be on white paper using thick coloured felt-tips rather than crayon or pencils.  They also need to be fairly simple without too much detail, and the number of colours should be limited. Again, an unusual gift idea, that is also very personal.


Photo Gifts

Last but not least, there are of course lots of services which will put any photo of your choice onto cards mugs, mousemats, and T-shirts etc.  Your local photo shop will almost certainly offer such a service.  Zazzle offers this service online, and what’s more you can even set up your own store there to sell your own designs - it’s a great way to indulge your creativity!  I have decided to indulge mine, and over the next week or two I will be adding a number of templates for a range of cards designed specifically for kids artwork.  I shall include a couple of Christmas ones as well, but it may be too late for most people, with or without postal strikes, even though Zazzle say they usually turn around orders in 24 hours.  I will of course let everyone know as soon as they are available.

At this point, I have to point out that like all services which simply print your photograph on to another object, be it card, mug or t-shirt, your photo will be used as supplied, unless otherwise stated.  (This of course does not apply to the first 2 services I have featured, where editing takes place as part of the creative process).
Because of this, any smudges, creases or tears in the original, will potentially show up on the finished product.  The printed colours may also be disappointing, as a detailed proofing process is uneconomic for items like this.  These issues may not be too significant for smaller cheaper objects like a mug, but I feel that it is important for larger scale projects which will be displayed long term upon your wall.  Because of this, at Artful Kids when we produce a canvas or framed print for the wall from a photograph of a child’s artwork, we do make sure that their work will always appear at its best, by removing anything which shouldn‘t be there, and making sure that the colours are saturated, bright, and as accurate as possible. 

Well this has turned into more of a sales pitch than I had intended but my excuse is that I am passionate about what I do, and blogs are about sharing.  However, I do realise that not everyone will share my enthusiasm so I will try to curb myself for a while!

Friday 20 November 2009

Christmas Card Factory


Inspired by the Madhouse and her project for stencilled Christmas cards, me and my 2 boys (aged 5 and 3) sat down to start our Christmas card production line.  You can see some of our efforts in the picture above, which displays one card by each of us.  You can't really tell from the photograph, which I'm not terribly pleased with  as it doesn't show the sparkle at all, but we used glitter paint for the trees and some snow, while the decorations were created with glitter glue, acrylic jewels and sequins. 

Wednesday 18 November 2009

Create your own Fridge Frames


This week  I’m going to focus on a project for making fridge frames for kids artwork.  So much of children’s artwork gets displayed on the fridge, and these frames are a simple way of presenting them more effectively.  You could make a range in different shapes and sizes, and of course they can also be used for displaying photos.  I should point out that this is not a project for children, though they can be involved in the final stages if you choose to decorate the frames.

You will need


  • Corrugated Card
  • Spray Paint (you can use ordinary paint, but it is easier to use spray paint)
  • Ruler
  • Cutting Mat (not essential, but helpful)
  • Scissors
  • Scalpel (not essential but useful)
  • Repositionable Spray Glue
  • Pencil
  • Stiff paper
  • Stiff card (thin packaging card is ideal)
  • Adhesive Magnetic tape
1.  Fold a piece of paper the size of your finished frame into quarters.

2.  Create your template by drawing one quarter of your design for the frame onto the folded paper, then cutting around the outline of the design.


    3.  Unfold the paper and place it onto the smooth side of the piece of corrugated card you are using for the frame - some spray glue will help to keep it in place. (see illustration)

    4.  Cut round the design with scissors, then remove the paper template.

    5.  Place a piece of paper the size of the intended artwork for framing (e.g. A4) in the centre of the frame, and using it as a guide, make marks about 1cm in from the corners (see illustration).  Rule, and then using a scalpel, cut between the marked lines to create the frame aperture.  The card removed from the centre can be used later to create a smaller frame if you like.


    6.  Depending on the size of your frame and the thickness of the card, you may need to support it by cutting a second identical frame out of a thin packaging card .  (I found that some of the Amazon book packaging was idea l for this, when creating small frames and that with plain card it was easier to use a scalpel).  Be warned - cutting complex shapes like the large gold one is quite hard work!

    7.  Glue the 2 frames together.  Make sure you make the aperture of the supporting frame slightly larger.
    Spray paint the corrugated front of the frame - you will need more than one coat of paint to cover the corrugated frame effectively.

    8.  Once dry, cut strips of the magnetic tape, and apply to the back of the frame (see illustration).


    9.  If you wish, the frame can be further decorated in any way you choose - simple foam shapes are ideal for this, stuck on with glue dots - I used off-cuts of corrugated paper for this, some which I had painted, and some metallic pieces which I already had.
    For the larger gold frame I added a small piece of card sprayed with the same gold paint as the frame itself, and printed out a piece of paper with the words ‘Masterpiece of the Week’ to trim and stick onto it.  The card was then applied to the bottom of the frame using foam sticky pads.


    Tuesday 10 November 2009

    For Budding Artists and Aspiring Art Thieves

    It's something of a cliche to look at a modern abstract work of art, and compare it with your 3 year old's latest masterpiece, but now you can take it a step further and get an authentic 'critique' of your child's artwork by a professional.  I first saw the service offered by Charles Kinbote (the pen name of a professional writer for whom this is a light-hearted side-line) a couple of years ago, when I was thinking about setting up Artful Kids, as my initial idea for the site was simply to offer a service where children's art is presented as if it were a gallery style poster (see below), and I thought that the commentaries made a perfect accompaniment.  To explain in more detail, Kinbote's Bespoke Art Commentary Service is dedicated to providing an appreciative, witty, wonderfully pretentious and bespoke review of a child's painting or drawing, and has apparently been used by several celebrities for their children, including Tilda Swinton, and Kate Moss.  The ideal age of the artist is about 2-6 years old.  Parents email an image of the artwork, and the child answers a series of basic questions.  Once complete, the finished product is supplied printed, framed and boxed to display alongside your child's artwork.  Click here to read an example.


    Featured Artist
    Thank you to those of you who have joined and uploaded photos of your children's artwork to the Artful Kids Flickr group.  This week I am introducing the first of my featured artists - hopefully the first of many, but I need more group members to upload photos if this is going to be anything like as regular a feature as I would like it to be.  Remember the artwork (paintings and drawings only) needs to have been done by a child under 12 years old, and please make the photos as good as you can, since I can't really use poor quality images.


    Fashion illustration, contributed by PrettyGoods, whose daughter Tess produced this work at the age of 11.  I think she shows real artistic talent, and love her creative use of backgrounds.


    If you would like to contribute your own photos to the group, the address is:
    http://www.flickr.com/groups/artfulkids


    And Finally....

    Out shopping for a present for my younger son's 3rd birthday, I spotted a toy in the Playmobil range, which made me do a double-take.  It was a 'jewel thief' set, which came complete with security guard, thief, grappling hook and other suitable tools, museum display case, artwork and easel.  Everything the aspiring young jewel or art thief needs to perfect their technique.  I'm not quite sure what message this is meant to portray to the younger child which Playmobil is aimed at - in fact I'm not sure myself whether to be amused or outraged?!  However, it appears to be part of a whole range of police, security, special agents and thieves - I suppose it's just art (or in this case toys) imitating reality - but how far do you take it at such a young age?


    Tuesday 3 November 2009

    Party Season

    It seems to be party season - every weekend at the moment I'm taking my elder son to birthday parties.  Over the last few weeks he's been to a Karting Party, a Tubing Party (i.e sledging - looked like great fun to me) an exotic animals party (where he got to handle snakes, tarantulas, giant frogs, etc) and a Football Party.  At least he would have gone to a football party, except silly mummy got the date wrong and turned up the day after.  My poor son was gutted, he'd been looking forward to it so much, and I felt so guilty.

    Last weekend I took him to a party where they had introduced a very simple idea that I rather liked.  In some ways it is rather similar to the idea used at some weddings where a large sheet of paper is provided for the wedding guests to sign, write messages, draw pictures or whatever.  On this occasion it was a large sheet of paper stuck to the wall,  for the 5 & 6 year old guests to draw upon, with the crayons supplied.  I thought it made a lovely keepsake for the future, especially since so many people move now and children’s friends change so quickly.  Unfortunately I didn’t have a camera, or even my phone with me, so can’t show you what it looked like, but I’m sure you get the general idea!


    New Artful Kids Flickr Group 

    I'm in the process at the moment of trying to customise my blog, so you may see some changes taking place over the next few weeks.  I have lots of things I'd like to do, but it's still very much a learning process at the moment.  Anyway, as part of this whole process I have set up an Artful Kids group on Flickr for people to contribute photos of their children's artwork to.  I'm limiting it to paintings or drawings, by children under the age of 12, and I've set it up so that you have to 'apply' to join, simply so that I'm hopefully less likely to get photos of goodness knows what added to it that way.  The plan is to choose one to feature on Artful Adventures each week, or each month (depends really on how many people contribute to it).  So if your child has just produced a masterpiece, then why not 'exhibit' it by adding it to the group and sharing it with us all, and maybe I'll choose it to feature.  The address is:  
    http://www.flickr.com/groups/artfulkids/

    Hand and Footprint Poems


    This week I thought I would share some poems to accompany children's hand and foot prints for gift and display purposes.  You may have come across them before - I first saw them when my son came home from his first term at school with one printed next to his handprint, which had then been laminated and had a calendar attached to the bottom.  I researched them further as I thought they looked perfect added to a child's photo and handprint, and it seems there are a whole lot of variations on a theme.  I've included a couple here, but many more can be found at the links given below: 

    Sometimes you get discouraged
    Because I am so small
    And always leave my fingerprints
    On furniture and walls.


    But everyday I'm growing
    I'll be grown up someday,
    And all these little fingerprints
    Will simply fade away


    So here's a special handprint
    Just so you can recall
    Exactly how my fingers looked
    When I was very small


    Find more hand & footprint poems at:

    Tuesday 27 October 2009

    Learning to Draw

    This week I thought I’d take a look at how children’s artwork develops from their earliest scribbles and daubs, through to about the age of 11 or 12.  Although all children will show the same broad developmental stages, the age at which they are reached may vary a little from child to child.  In spite of this, within each stage every child will have their own particular style and characteristics which reflect their personality.  The terminology used for the different stages, does appear to vary somewhat according to the author you read, but broadly the development is as follows:

    Beginnings

    The earliest stage, which begins at around 18 months or a little earlier, is that of simple scribbling.  To begin with, the scribbles are entirely random since the child does not yet have the control necessary for anything else.  The earliest scribbles are a series of left and right motions, then later, circular motions are added as more control develops.  The markings can be strong or light according to the child’s personality.  From about their second birthday, as the child gains more muscle control, a more controlled form of scribbling starts, and more demanding patterns of simple shapes, circles, wavy lines and crosses are produced.  The child also becomes interested in arrangement and can produce simple collages of coloured paper, or place stones in patterns.  Once children have established this ‘controlled scribbling‘, they begin to name their scribbles - an important milestone in their development.  Though the appearance of this work may be simple, the first scribbles a child makes are precious.  I still have the earliest drawings that my 2 boys ever made, and I don’t intend to throw them away - they are as important to me as the lock of hair from their first hair-cut (well actually 2nd or 3rd hair cut in the case of my eldest son, since I kept losing it!) or their first words.


    The next stage of scribbling is when the child begins to name their scribble.  I think this is just about the stage that my 2 (soon to be 3) year old has reached.  He will do what appears to be a not entirely random scribble with red crayon, and tell me that it is a fire-engine, or choose a yellow crayon and tell me his drawing is a banana.  I have to take his word for it, as they appear completely abstract to me.  However, in his mind, that’s what it is.


    Increasingly though now, I am beginning to see the occasional more recognisable shape appearing, which he takes great care with.  It appears that the act of drawing is now less about the action, than the storytelling, or a more imaginative approach.  He may have been influenced in this a little by his elder brother, but it appears that he is now approaching a crucial stage that children go through as their artistic prowess develops, the stage where true recognisable representations first occur.  As a parent, I find this stage quite exciting, as it offers further insight into the mind of your child. 


    Representation

    This next stage, which normally occurs from about the age of 3 is usually called ‘pre-symbolism’ or ‘pre-schematic’ and this represents the first conscious creation of form.  The earliest recognisable drawings are usually simple figures, created by combining circles and lines.  This reflects the child’s social progress.   Other forms develop as time goes on,  and the symbols constantly change as new concepts develop.  The drawings usually indicate what the child thinks is most important about the subject, and objects are placed apparently randomly on the page.   Realism is not the objective here - the child is representing a concept rather than observing.  Emotions will influence their drawings more than reality, so that when a child draws mummy next to a house, she may be depicted larger than the house, because she plays a more important part in the child’s life.  The use of colour is also more emotional than logical.


    At around the age of 4 or 5 children will start to develop more complex stories around their drawings, changing basic forms as needed to express them.  As their social world broadens and they start school, children enter the ‘schematic’ or ‘symbolic’ stage.  Realism is still not the objective, instead the child creates a vocabulary of images or their own set of symbols which are based on their understanding of what is being drawn rather than on observation.  Each child’s symbols are therefore unique to the child.  You will still see exaggeration between figures used to express strong feelings about a subject.

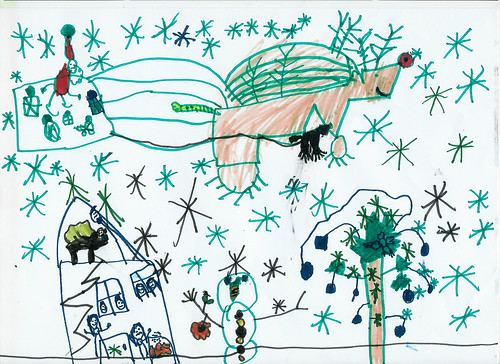
    It is at about this stage that a greater awareness of the concept of space develops.  The beginnings of composition appear, items in the drawing will begin to be spatially related, and the familiar ‘baseline’ at the bottom of the paper is introduced to organise the space on the page.  Often green (to represent grass) the figures will stand on this line.  Slightly older children may add secondary baselines for background objects, and a blue skyline for the sun and clouds.  This is the stage which my elder son, at just turned 5 has reached - he has been using a base line at the bottom of the page and a sky line at the top for several months now.  Apparently at 3, just 1% of children will use a baseline (so if your 3 year old is using one, they are artistically advanced!), while at 8, a massive 96% will use one.  At this point cultural influences become more important.  For example they may start copying cartoons or things they see on TV.  My son has been heavily into this for about a year now, especially Power Rangers and Transformers.  Other typical features are that colours become more naturalistic, and objects in the drawing have a relationship to what is up and what is down.


    Reality Bites

    As the child matures and reaches around 9 years old, they begin to have an increased concern for realism, and find that their generalised symbols are too limiting and don’t look like the real thing.  This is the first time that the child becomes aware of their lack of ability to depict things realistically, and it can be a frustrating time for some, as their aspiration outstrips their abilities and knowledge.  Some children give up on drawing almost entirely at this point.  However others become skilled, and it is at this stage that formal artistic training can benefit the child most.  At first this new attention to realism often manifests itself by an increasing concern for detail, and there is a conflict between how the subject actually looks and what the child knows about the object.  Formal training which will teach them how to see and observe- for example leaves are not just green, the sky is not just blue - and an introduction to the rules of perspective, can help to resolve the conflict.  However, even without this, some children do start to show an appreciation of basic perspective - the baseline disappears, and they will begin to depict overlapping objects and a horizon, along with the use of small to large objects, to represent distance.  Some use of shading is also seen.


    At this ‘gang stage‘, a child can have a level of self-awareness to the point of being extremely self-critical, and their drawings are often less spontaneous as a result.

    Bizarrely my elder son, being something of a perfectionist, sometimes seems to be exhibiting the kind of behaviour expected at around 9 years old, even though he is only 5, in that quite often if his drawing does not conform to what he is trying to do (or has seen me do) he will announce in frustration ’that’s rubbish‘, screw it up and go into a sulk.  I am trying to combat this by showing him ways of ’salvaging’ mistakes, or even the idea of the ’happy accident’ where you capitalise on them, and by generally emphasising the importance of practice, learning and experience.  I think I’m having some success, but sometimes it’s a hard slog!


    And Finally….
    The final, pre-adolescent stage occurs at around the age of 10-13.  At this stage, as indeed we saw earlier, the importance the child attaches to realism, often discourages them.  Unfortunately many people remain in this stage throughout adulthood because they do not continue trying.

    Of course I have only touched the surface here of a much more in-depth field, so if anyone wants to explore it further, the following references and suggestions for further reading may help - I intend to explore them further myself at some point!


    Herbert Read 'Education Through Art' 1966
    Rhoda Kellog 'Analysing Children's Art' 1970Viktor Lowenfeld  'Creative & Mental Growth' 1978
    David Lewid & James Greene 'Your Child's Drawings:Their Hidden Meaning' 1983


    http://en.wikipedia.org/wiki/Child_art

    Tuesday 20 October 2009

    Kids Mats-erpieces!

    I came across a brilliant new product the other day, which really excited me with its possibilities, only to discover that it's not yet available in Europe, (as with lots of these things, it originates in the US).  Basically it's whiteboard paint which enables you to paint a whole wall and use it as a canvas or noticeboard - something you can't really do with blackboard paint without making the whole room dark.  It's available in two different kinds from ideapaint.com - professional (which takes a week to 'cure' once applied, and is solvent based, so is not really appropriate for a home environment) which is available here now, and the water-based CR8 paint, which isn't.  I am so frustrated!  Hopefully it will become available in the not too distant future, as there are quite a few places I can think of using it, aside from the obvious kids bedrooms.


    Mats-erpieces


    OK so I know the title is really corny, but this week I thought I'd introduce another really simple, but useful way of using kids artwork to create laminated place mats or work mats.  I should perhaps point out here that these are more for creating a wipe clean surface to contain mess, rather than for protecting from heat!

    The very simplest idea, if you have an A3 or A4 piece of artwork, is simply to laminate it as it is.  But if the original artwork is a non-standard size, then mounting it onto a sheet of coloured paper or card, will give you the correct dimensions, and add further creative potential. Using a thin card base results in a stiffer mat.  The background can act as a frame for the artwork, or you could also experiment with patterned backgrounds such as those created by bubble prints or marbling (if you have any of those) or even commercially available papers if you don't.


    This is also quite a good way of using collage work, as long as it is flat enough to go through a laminator.  Sequins, tissue paper, glitter, leaves etc. can all be used.  For example you could easily create an autumn themed mat in this way

    As well as artwork, you can also include handprints, or photos, or add your child's 'signature' - all of these things help to personalise the finished mat.


    Instead of using a single artwork for a mat, you could create a composite image from different elements or motifs cut from several different artworks, as I did with this one.  Alternatively you could crop a larger painting and create your own decorative frame, to create a mat full of 'bling' like this one.


     And finally....

    I saw this ad in the Financial Times this weekend - it was advertising their regular Mrs Moneypenny feature, ('10 years of our ultra straight-talking mother and businesswoman') but it just amused me, so I thought I'd share it.  The quality of the image isn't great, but hopefully you can read it!


    Monday 12 October 2009

    Storing kids artwork - just where do you keep it all?

    I can't believe it's a week since my last post - the time just goes so quickly! This week I have decided to look at a few products available for displaying and storing kids artwork - it's something which I will introduce from time to time as I see them, but given the relative rarity of such products, it probably won't be too frequent. It's amazing how many products are out there for kids arts and crafts - thousands of brilliant ideas which you could spend a fortune on, but it seems there's not quite so much out there for displaying and storing the finished product.


    A4 Picture Pockets


    This giant PVC picture holder has 9 pockets for 18 A4 -sized artworks, and is a simple way to display kids artwork and keep it clean. It is available for £15.00 from Aspace


    Children's Art Portfolios


    Not something that you see very often, Letterbox have a number of kids portfolios available which offer a special and attractive way of storing their artwork.

    The simplest traditional style folios, at just £6.99 are illustrated with a choice of 3 different themes, and tied with ribbons. They can store artwork up to A3 in size.


    They also have a more expensive filing system version which can be personalised with a photograph. With a carry handle and 9 expandable pockets, it will accomodate artwork up to A3 in size, and is available for £16.99.


    However, if A3 is too small, and your child is producing larger masterpieces, then you may need to consider these heavy-duty polypropylene art folders which will accommodate artwork up to A2 in size. Available in pink or blue for £13.00 from the Great Little Trading Company.


    Alternatively of course, you could always create your own art storage system for A4 work, by decorating and personalising your own ring binder with loose leaf plastic pocket inserts. In fact I might just go and do that!!


    And Finally....

    A late addition, which I have just seen, and which seems appropriate for here, is another storage idea for kids artwork which Vertbaudet have to offer. This Drawing Tidy offers 4 stacked compartments for storing and sorting drawings. It is fixed to the wall, and is 35 cms wide. It is currently available for £39.00.


    Needless to say, if anyone else out there has come across any other products, or brilliant ideas for storing and displaying kids artwork, please feel free to share them!