Crafty Blogs

Friday 29 January 2010

Stained Glass Window Art


It's been a while since I posted my last tutorial project for fridge frames, so I thought I would offer up this project for a piece of colourful window art. This is a project which needs a laminator to create. I know not every home will have one of these, though the small basic ones are quite cheap these days, and I actually find them quite useful for a whole host of household purposes, ranging from protecting favourite recipes and knitting patterns, to creating notices and labels, and last but most definitely not least, for creative projects like this one.  My laminator is a Fellowes Saturn A4 model - not the cheapest, and not the most expensive, but I've been very happy with it.

Even small children can take part in this activity, as long as the actual laminating and cutting of the window mount is undertaken by an adult.

You will need…..

 
  • Laminator
  • Laminator pouches (thickness doesn’t really matter here)
  • Variety of coloured tissue paper
  • Scissors
  • Craft Knife
  • Ruler
  • Black card
  • Sticky Tape
Method

1. Cut or tear a variety of small pieces of tissue paper.

2. Open the laminator pouch, and carefully arrange the pieces of tissue paper on the plastic. It doesn’t matter if they overlap, since this just creates a more interesting result as the colours mix together. Try as far as possible, to make sure that the paper doesn’t spill over the edges of the pouch. Don’t be too precise about where the tissue is placed, as it tends to move a bit when you place it in the laminator anyway!


3. Carefully close the pouch over the tissue paper.

4. Heat the laminator up - if there is more than one setting, make sure you use the correct one for the thickness of plastic that you are using.

5. Carefully holding the edges of the closed pouch, feed it into the machine - sometimes it helps if you support it on a piece of card the same size as the pouch, sliding it off the card and into the laminator.


6. Take a piece of black card, the same size or larger than the your laminated sheet. Using a craft knife and ruler, cut a window slightly smaller than the laminated sheet.  Obviously this would have to be done by an adult.


7. Use the sticky tape to attach your laminated sheet to the reverse of the frame.


8. The framed sheet can then be blu-tacked to a window to display the full effect.

Friday 22 January 2010

Art Materials - Kicking off with Canvas

`


I am introducing a new regular informative series to Artful Adventures on the subject of Art materials - I'm not sure yet quite how regular this will be, but there are lots of art materials out there, with new ones being introduced all the time so there's plenty of material to go at (no pun intended).  I thought I'd kick off with canvas, the most traditional ground for painting, which has undergone such a surge of popularity in recent years.

Canvas, when used as a support for painting, is usually stretched tightly across a wooden stretcher.  Traditionally, these canvases were then framed, though the fashion today is usually to leave them unframed.  Because it was a linen or cotton canvas (the old masters often used hemp which is no longer available) a natural material which will absorb moisture from the air and lose tension over time, canvases were designed to have the capacity to be tightened further at a later date by knocking in small wedges to the corner joints at the rear of the canvas.   Following stretching, the traditional manufacture of a stretched canvas involves painting a coating of glue size over the natural canvas fabric, followed by several coats of primer.  This is to prevent the paint soaking into the material which can ultimately cause it to rot over time.  The primer also gives a bright white background to paint on, giving subsequent paint layers greater brightness and luminosity.  It can also give a smoother surface, though part of the attraction of canvas today is its textural quality.  The disadvantage of canvases, especially large ones, apart from the tendency to sag over time, is that they can warp or twist.  The quality of the stretcher itself is therefore important.  The wood needs to be strong and well-seasoned and the frame needs to have enough bracing to prevent distortion.  Lots of this I have learned by experience - I now only buy quality stretchers for Artful Kids, and have moved to using a polyester based canvas for printing which is less prone to sagging, as it does not absorb moisture.  For painting, the best quality canvases are made using linen, but this is quite expensive, so most of what is available cheaply and ready made will be cotton, though this is less stable and can be prone to mildew.

As with most things, you can make your own canvases from scratch - I was taught how to do this at art school, but my canvases always seemed to be a bit skew-wiff (I don't have brilliant woodworking skills). However if you are after a size of canvas that is not easily available, you can buy the stretcher bars and braces separately (with pre-cut joints), knock them together and stretch your own.  Getting even tension across a large canvas can be tricky however and takes practice.  For standard and especially smaller sizes, it is generally no cheaper to make your own than to buy ready made, especially if you're not too concerned about the quality.  Buying in bulk also cuts down the cost if you are doing some work with a group of children.

Of course canvas doesn't have to be stretched, and unstretched it takes on more of the character of a textile hanging - this too has a history.  During the medieval and Tudor periods, if you couldn't afford to have a genuine tapestry on your wall, you'd hang a 'stained' - or painted linen hanging on your wall instead. At a later date painted and stencilled cloths were also used on the floor as an early form of cheap carpet, and the forerunner of linoleum. When painting on unstretched canvas, you have to restrict yourself to thinner layers of paint to prevent cracking and flaking, unless you are using purpose designed fabric paints. 


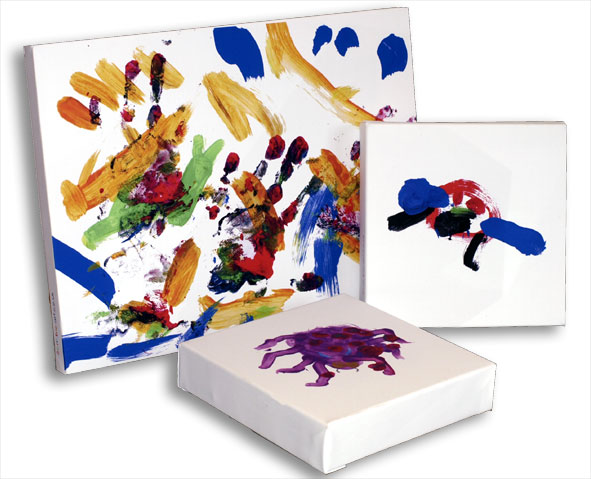
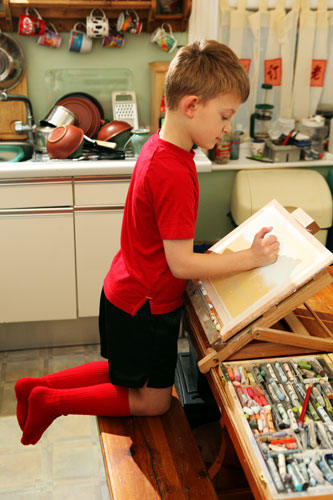
The current popularity of canvases means that you can pick up ready stetched and primed canvases pretty cheaply these days, especially in smaller sizes, but though you may occasionally let your children loose on one, it would be extravagant to let young children them use them all the time.  They're good to use for special occasions, and also for those simple but effective techniques where you can't really go wrong, and are most likely to produce an effective result (for example hand and footprints, splatter painting etc) that you intend to hang on a wall.  However, I recently came across a product at the Early Learning Centre which allows your child to paint on canvas on a regular basis, and wash it when you want to use it again.  It did occur to me that as it appeared to be nothing more than a 1m square of canvas fabric that has been hemmed at the edges, this would be very easy to make yourself, but possibly they have treated it in some way to become stain resistant.  (I'm afraid I have an almost reflex action when looking at anything I like, that automatically causes me to consider whether I could make it myself. Being brought up in an 'economically challenged' family was a great stimulus to my creativity!)  The advantage with this is that if your 2 year old does unexpectedly create a masterpiece, you can keep it unwashed and hang it on the wall, or even have it stretched perhaps.  After all for £10 it's not particularly expensive.


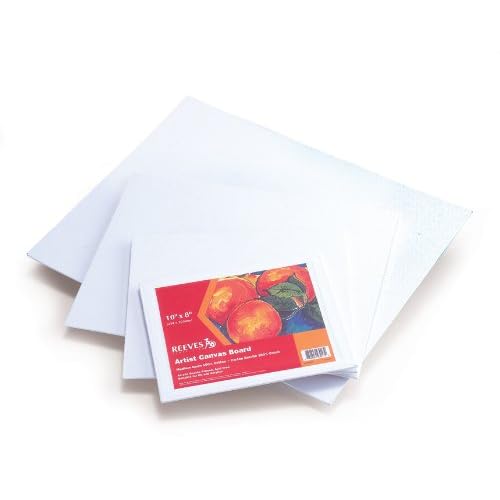
If you want the textured effect of canvas, but are not particularly interested in the bulk of a stretched canvas, then you can buy canvas board- this is essentially a hardboard base with a white primed canvas style surface.  It feels different to paint on, as it does not have the same 'give' or flexibility as a stretched canvas, but at times this might be an advantage. Canvas board has the advantage also that if the size is appropriate, instead of hanging it on the wall, you can add some felt to the back and use it as an artistic place mat. Again you can make your own canvas board much more cheaply, but you have to weigh up whether the extra hassle is worth it.


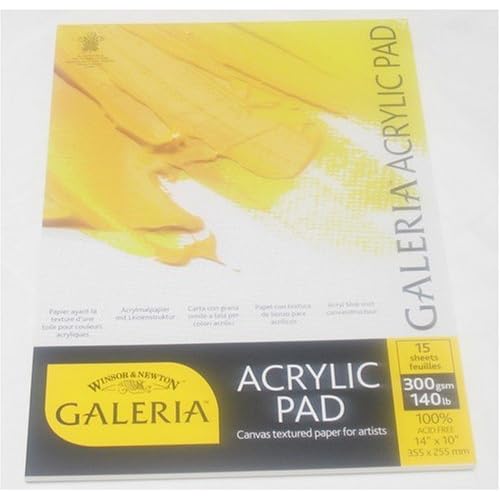
For sketches and preliminary work or where you want the effect of canvas without too much hassle or expense, there are the pads or blocks of paper designed for oil and/or acrylic work. Canvas paper has a linen effect texture which can be used quite effectively with pastels, crayons and charcoal as well as with paint.  A sheet can always be mounted or glued onto board if more support is required.

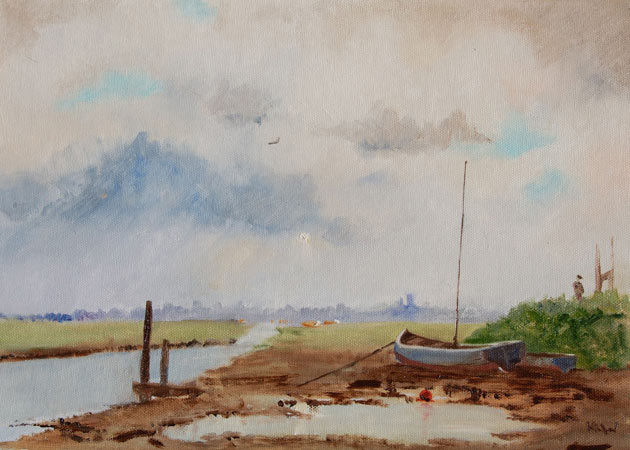
Finally of course, if all else fails, you can always cheat and ask me to put the masterpiece your child has produced on paper, onto canvas.  This has the added advantage that it will be presented at its best, with all those creases, smudges and tears removed.  Visit Artful Kids for full details.

This is only intended to be a very basic introduction to canvas as an art material - hopefully I haven't bored everyone rigid, but for anyone with a more serious interest in finding out about canvas as a painting support, there is of course lots more material out there on the internet.  A few examples are given here:

Making a Hand Made Canvas for Painting on
How to Prime and Stretch a Canvas
The Artist's Canvas


Friday 15 January 2010

Home-grown Art Prodigy


Having just written a post about child art prodigies, I now hear we now have our very own home-grown version.  About time too, I was starting to feel a little left out, since America and Australia both have their own! (You can read about them here in my earlier post).  Even better, ours is a boy (the others are girls) and works in a representational style, which is unusual for prodigies as young as he is.  Kieron Williamson is just 7 years old, but apparently has been painting for 2 years.  Based in Norfolk, he specialises in landscapes, and his paintings sell for figures in excess of £900.  He currently has a waiting list of 680 people waiting to buy his paintings and his last exhibition sold out in less than 15 minutes.


Like the other prodigies previously discussed, Kieron has a supportive background; his father is also an art dealer.  There is no doubt however that his artwork is astonishingly good for his age, although not worth £900 a painting in my opinion - the prices and the waiting list, seem to be generated more by his age than the quality of the paintings in their own right, and tellingly, there have been offers to buy his schoolbooks too.  I think the excessive demand is being created by those who feel that if he is going to be a 'Great Artist', then buying one of his early works for just £900 is a worthwhile long-term investment.  A highly risky strategy though since child art prodigies don't always turn into adult artistic geniuses, and luckily for Kieron his parents seem to have quite a healthy attitude to his talent, being willing to let him stop painting and pursue something else if that's what he wants.  Another one to watch then!

Finally, here are Kieron's top tips for landscape painting:

1 "Go on holiday to where you really want to go, and be inspired."
2 "Start with acrylics, then watercolours, then pastels and then oils"
3 When you set out to do a landscape, "start with the sky first, top to bottom."
4 "When you do distance, it's lighter, and when you do foreground it comes darker."
5 "If you're doing a figure in the winter, do a brown head, leave a small gap, do a blue jacket and brown legs.  Then with the gap get a red pastel and do a flick of red so it looks like a scarf."
6 "Keep on painting."


You can read the full Guardian article here
Photos by Graham Turner - The Guardian

Monday 11 January 2010

First Featured Artist of 2010

Here is my first Featured Artist of 2010.

Lexie tree by mammydalby.

This artwork was submitted to the Artful Kids Flickr Group by mammydalby whose daughter Lexie is the artist.  It's a little different to the work I have featured so far, and with all the pink blossom on the tree, reminds me of spring and sunnier days to come, (hopefully soon, though it seems very distant at the moment with all the snow around).

The Featured Artist is a regular monthly post, with the artist selected from artwork uploaded to the above Flickr group.

Monday 4 January 2010

Creative ways to recycle Christmas Cards

The easiest way to recycle your old Christmas Cards is to take them all down to the nearest recycling point, but there are much more creative ways of recycling them.  Here are a few suggestions:

Cut them along the fold, and use the blank side of each for shopping lists, notes etc. (This is something which my parents always did, and I have adopted the same habit!)

Use the pictures to make gift tags for next year, using decorative cutting scissors to create an attractive edge (again, this is a simple idea that has been around for years, saves money, and takes minimal effort).

Cut up the pictures themselves, and cut out individual motifs and messages to make next year's Christmas cards and gift tags.  This is a little bit more creative, and involves more effort than the one above, but will result in something that is unique, and less obviously recycled from last year's cards.  If you use sticky foam pads or glue dots to stick on the individual elements, it creates an attractive 3D effect which you see on lots of the handmade cards in the shops, and is really simple to do.


Cut out individual characters from the cards (e.g. snowmen, santa, reindeer, robins etc.) and attach them onto the top of a lolly stick with sticky tape to make a simple stick puppet.  If you want to go the whole hog, you could also cut out elements of scenery (trees, houses etc.) from the cards too.  Alternatively you can use these elements to create your own Christmas scene on dark coloured card, and paint on a simple snow background.


Cut up the picture to make a simple Christmas jigsaw.

Cut the picture up into small pieces, (either squares or more random shapes) and use to make mosaic patterns, or collages, as shown here (don't ask about the empty raisin boxes - they wanted to stick them on, so who am I to interfere with their creative innovations?)


The links below give some more ideas:


Let me know if you have any other creative ways of using old Christmas cards!